Table of Contents
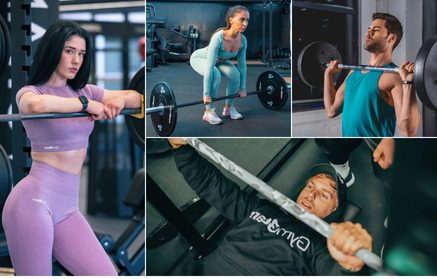
Among the 10 most effective compound exercises are the Bench Press, Deadlifts, Back Squats, Hip Thrusts, Kettlebell Swings, and Reverse Lunges. Compound exercises engage multiple muscle groups at once. For example, a squat activates the quadriceps (m. quadriceps femoris), hamstrings (m. biceps femoris), and gluteus maximus (m. gluteus maximus) simultaneously. These exercises are suitable for both beginners and advanced individuals. Performing them requires only a barbell with weight plates, dumbbells, a kettlebell, and a bench. The article contains two sample full-body workouts.
For muscle growth and weight loss, choose a load of 60–80 % of 1RM (one-repetition maximum) for 4–6 sets of 8–12 repetitions with 1–3 minute rest. For strength development, use 80–95 % of 1RM for 4–6 sets of 2–6 repetitions with rest periods of 90 seconds to 4 minutes. Include this training 2–3 times per week with 48 hours of rest between sessions. In 45 minutes of exercise, a 65 kg woman burns around 250 kcal and an 80 kg man burns around 300 kcal. After training, the body continues to burn calories at rest due to EPOC for several hours.
Compound exercises aren’t just a great option when you’re short on time and can’t train each muscle group individually. They offer a host of other benefits that make a strong case for including them in any workout plan. But today’s article isn’t only about the advantages of compound movements—we’ll also guide you through a selection of the most effective ones, with instructions on proper form and two example workouts included.
What Are Compound Exercises?
Compound—or multi-joint—exercises are defined by the fact that they engage multiple muscle groups at the same time. The opposite would be isolation exercises, which focus on a single muscle. A typical example of a compound movement is the squat, which works the glutes, thighs and calves, and challenges the core. An isolation movement, on the other hand, would be something like a bicep curl, which primarily targets the biceps. Isolation work can be useful when focusing on one specific area of the body—for example, in a bodybuilding split routine. Compound exercises, however, come with several advantages when it comes to building muscle, increasing strength, or supporting weight loss. [2]

5 Benefits of Compound Exercises
1. Train Multiple Muscle Groups at Once
Compound exercises like squats, deadlifts or bench presses require coordinated effort from several muscle groups and joints at the same time. During a squat, for example, your quadriceps (front of the thighs), hamstrings (back of the thighs), glutes and lower back muscles are primarily engaged. At the same time, your calves and core muscles are also activated to stabilise the spine throughout the movement. This simultaneous engagement makes your training much more efficient, as you work multiple areas of the body in a single movement—significantly boosting the overall impact of your workout. [3]
That’s why compound exercises are ideal for full-body training. They also save you time—if you had to do 2–3 different exercises for each body part, you could easily spend hours in the gym. With compound movements, you can get a solid session done in under an hour. It’s a much more time-efficient way to train.
2. Build Strength
Compound exercises are essential for building overall strength. Because they engage large muscle groups, they allow you to lift heavier weights. This generates greater mechanical tension in the muscles—one of the key stimuli for strength development. To maximise strength gains, it’s important to train with heavy loads, perform fewer reps, and include longer rest periods between sets. So, if your main goal is to get stronger, compound lifts should absolutely be a core part of your gym routine. [4]
If you’d like to learn more about how to structure your training for strength, muscle growth, or fat loss, check out our article What Weights Should You Lift for Muscle Gain, Strength or Fat Loss?

3. Promote Muscle Growth
Compound exercises stand out for their high intensity and activation of large muscle groups. When performed with sufficient weight, repetitions, and sets, they can quickly lead to muscle fatigue. This creates metabolic stress, which triggers anabolic processes—mechanisms that stimulate muscle growth (hypertrophy).
Compound exercises can even temporarily increase levels of anabolic hormones such as testosterone and growth hormone. However, research is still inconclusive on how much long-term impact this short-term hormone spike has on hypertrophy. [3]
Including compound movements in your training programme can, therefore, lead to more effective muscle gains. To get the best results, though, it’s essential to combine them with isolation exercises. Make sure to also allow adequate recovery time (at least 24 hours between sessions targeting the same muscle group), get enough sleep, and follow a balanced diet rich in protein and other essential nutrients. [5]
Want to learn how to build the right diet and training routine for maximum muscle growth? Check out our article What to Eat and How to Train to Finally Gain Muscle.
4. Burn More Calories
Another major advantage of compound exercises is that they target the body’s largest muscle groups, leading to a higher calorie burn. This helps not only with weight maintenance, but also supports fat loss.
- In a 45-minute session focused on compound movements, a 65 kg woman can burn around 250 kcal, while an 80 kg man may burn about 300 kcal. [6]
- That said, the number of calories burned always depends on the weight used, training intensity, rest duration, and other individual factors.
And here’s the best part—after your workout, your body continues to burn more calories at rest, thanks to a phenomenon known as EPOC (Excess Post-exercise Oxygen Consumption). That means your metabolism stays elevated for hours after your session. [7]
Trying to lose weight and want to know what to focus on? Find the key strategies in our article Simple Weight Loss Basics: You’ll Be Surprised What Really Matters.
5. Improve Full-Body Coordination
Compound movements are often technically demanding. They require coordination across the whole body, and in most cases, they also involve the core muscles. This strengthens the deep stabilising muscles (DSM), which improves overall stability and posture. Better core strength doesn’t just benefit sports performance—it also helps with daily activities like lifting objects from the ground. You’ll feel more balanced, which reduces your risk of falls. [3]
If your goal is to enhance coordination, we recommend trying The 10 Best Balance Trainer Exercises to Improve Stability, Strengthen the Back and Build Full-Body Control.
You might be interested in these products:
10 Best Compound Exercises
Before jumping into your workout, make sure you’ve got everything you need. For the exercises listed, you’ll need a barbell with weight plates set in a rack, a barbell pad, a dumbbell, a kettlebell, a bench, and an exercise mat. Most exercises also include variations using alternative equipment—so if you don’t have access to a barbell, you can often use dumbbells instead.
Pick the exercises that fit your training plan, or get inspired by the full-body workouts further down. Always start with a warm-up—this could be jogging on a treadmill, using a rowing machine, doing jumping jacks or skipping rope. Then, follow it up with dynamic mobility exercises for your entire body, from head to toe. Begin the main workout with lighter weights to practise your form, and gradually increase the load based on how you feel and your training goals. Finish the session with a short stretch to help your muscles recover.
1. Bench Press
- Starting position: Lie on your back on a flat bench. Retract your shoulder blades and grip the barbell with an overhand grip. Your wrists should stay straight, with your elbows directly under the bar. Grip width should be slightly wider than shoulder-width apart. Your feet should be flat on the ground with knees bent at roughly a 90-degree angle. A slight arch in the lower back is acceptable during the exercise. Your shoulders and glutes should remain in full contact with the bench throughout. Keep your core and glute muscles engaged during the movement.
- Execution: Press the bar into the starting position above your chest. Inhale as you slowly lower the bar towards your chest. At the bottom, the bar should lightly touch the midline of your sternum. At this point, your arms should form a 45–60° angle with your torso. Exhale and press the bar upwards by contracting your chest muscles until your arms are nearly fully extended. The bar path should follow a slight arc as you push. Once you return to the top, continue with the next repetition.
- Common mistakes: Flaring or tucking the elbows too much, uncontrolled movement, using inappropriate weight, excessive arching of the back, poor core and glute activation, and limited range of motion.
- Muscles worked: Primarily the chest (pectorals), triceps, and front shoulders. Secondarily the forearms, upper back (scapular stabilisers), and core stabilisers.

Alternative variations:
1. Dumbbell Bench Press
If you don’t have access to a barbell, you can perform this exercise with dumbbells. One benefit is that it allows you to work each side of the body independently and gives you a longer range of motion. As you press upwards, aim to bring the dumbbells slightly towards each other—this increases engagement of the inner chest.
2. Bench Press With a Narrow or Wide Grip
Adjusting the grip width changes muscle activation. A narrow grip places more emphasis on the triceps, while a wider grip increases chest engagement.
2. Dumbbell Pullover
- Starting position: Rest the upper part of your back sideways on a flat bench. Your feet should be flat on the floor, with knees bent. Extend your arms overhead and grip a dumbbell at the top, holding the weight by the plates or hex ends. Keep your elbows slightly bent. Engage your core and glutes throughout the exercise.
- Execution: Exhale and engage your chest and arm muscles as you bring the dumbbell up and over your chest. Inhale as you return to the starting position. Repeat the movement smoothly for the desired number of reps.
- Common mistakes: Excessive bending at the elbows, uncontrolled movement, using too much weight, overarching the back, and a limited range of motion.
- Muscles worked: Primarily the latissimus dorsi and chest (especially the lower part). Secondarily, the triceps, upper back (scapular muscles), serratus anterior, and core stabilisers.

Alternative variations:
1. Pullover With a Weight Plate or Kettlebell
If you don’t have a dumbbell available, you can use a weight plate or a kettlebell. Hold the plate by its sides or grip the kettlebell handle with both hands from the sides. Perform the exercise as you would with a dumbbell.
2. Pullover With an EZ Bar
You can also perform this movement with a short EZ bar. Hold the bar with an overhand grip in the middle, keeping your hands closer than shoulder-width apart. Perform the movement just like with a dumbbell.
3. Strict Barbell Overhead Press
- Starting position: Stand with your feet shoulder-width apart and grip the barbell with both hands using an overhand grip. Stand upright with a slight bend in the knees. Bring the bar up to just below your chin, positioned in front of the upper chest. Keep your wrists straight, pull your shoulders down and away from your ears, and engage your shoulder blades.
- Execution: Exhale as you press the bar overhead in a controlled motion. Inhale as you return the bar smoothly back to the starting position. Repeat for the desired number of reps.
- Common mistakes: Shrugging the shoulders, bent wrists, uncontrolled (jerky) movement, using inappropriate weight, and excessive leaning backwards.
- Muscles worked: Primarily the deltoids (shoulders), triceps, and upper chest. Secondarily the upper trapezius, core, trunk stabilisers, and lower back.

Alternative variations:
1. Dumbbell or Kettlebell Overhead Press
This movement also works well with a pair of dumbbells or kettlebells. Hold them beside your shoulders and perform the press in the same manner as with a barbell.
4. Overhand Grip Barbell Bent-Over Row
- Starting position: Stand with your feet hip-width apart and slightly bend your knees. Hinge forward at the hips while keeping a natural curve in your spine. Pull your shoulders away from your ears and keep your head in line with your spine. Grip the barbell with an overhand grip, shoulder-width apart, and lift it to just above your knees.
- Execution: Exhale and use your back muscles to pull the barbell towards your hips. Then, return the bar under control to the position just above your knees and continue with the next rep.
- Common mistakes: Rounding the back, locking out the knees, insufficient forward lean, and a limited range of motion.
- Muscles worked: Primarily the trapezius, back muscles (including latissimus dorsi), arms, and forearms. Secondarily the glutes and hamstrings.

Alternative variations:
1. Dumbbell or Kettlebell Bent-Over Row
If you don’t have a barbell, you can do this movement with two dumbbells or kettlebells. Use an overhand grip and row the weights towards your waist. Keep the same body position as with the barbell version.
2. Sandbag Bent-Over Row
You can also use a powerbag or a water-weight training bag. Grab the handles and perform the row in the same way as you would with a barbell.
3. Underhand Grip Barbell Bent-Over Row
If you want to focus more on your biceps, switch to an underhand grip. This version increases arm engagement, particularly the biceps.
5. Dumbbell Roll-Ups
- Starting position: Lie flat on your back with your legs extended. Hold a dumbbell in one hand and extend your arm in front of you. Let your other arm rest straight alongside your body.
- Execution: Exhale and engage your core to roll up into a seated position, keeping your legs straight. As you rise, lift the dumbbell into an overhead press. Inhale as you slowly lower yourself back down with control. Repeat for the desired reps, then switch arms.
- Common mistakes: Incomplete range of motion, lack of control during the movement, and overarching the back.
- Muscles worked: Primarily the rectus abdominis (abs) and shoulder muscles. Secondarily the obliques, hip flexors, spinal erectors, and trunk stabilisers.

Alternative variations:
1. Plate Roll-Ups
Instead of a dumbbell, you can use a weight plate. Hold it with both hands extended in front of you while lying down. Then perform the exercise as described for the dumbbell variation.
6. Russian Kettlebell Swing
- Starting position: Stand with your feet roughly shoulder-width apart. Hold the kettlebell with both arms extended in front of you. Keep your back straight throughout, your shoulders pulled down, your core engaged, and your eyes looking straight ahead.
- Execution: Inhale as you hinge at the hips and slightly bend your knees, bringing the kettlebell between your legs. Exhale and drive your hips forward by engaging your glutes and hamstrings, swinging the kettlebell up in front of you to roughly chest or eye level. Return to the starting position and move straight into the next rep.
- Common mistakes: Rounding or over-arching the back, knees collapsing inward, insufficient activation of the lower body.
- Muscles worked: Primarily the glutes, hamstrings, and spinal erectors. Secondarily, the core, back, and forearms.

Alternative variations:
1. American Kettlebell Swing
If you want to engage the shoulders more, try the American swing. At the top of the movement, aim to raise the kettlebell overhead. Using a controlled swing, bring the kettlebell into full overhead extension with the bottom facing the ceiling. Then move directly into the next rep.
7. Barbell Hip Thrust
- Starting position: Sit on the floor with your upper back supported against a bench and your head aligned with your spine. Roll an empty or loaded barbell onto your hips. Use a barbell pad to avoid discomfort on your pelvis. Bring your feet towards your glutes and place them flat on the ground or support yourself on your heels. Feet should be roughly shoulder-width apart, and knees slightly turned outwards.
- Execution: Engage your core. Exhale and drive your hips upward by squeezing your glutes, lifting the barbell until your torso is parallel with the floor. In the top position, hold the contraction for one to two seconds before lowering your hips back down in a controlled manner. Then, go into the next rep.
- Common mistakes: Overextending the lower back at the top, craning the neck, uncontrolled movement, incorrect foot placement, shallow range of motion and using inappropriate weight.
- Muscles worked: Primarily the glutes and hamstrings. Secondarily, the quadriceps, spinal erectors, and core.

Alternative variations:
1. Kettlebell or Dumbbell Hip Thrust
If you don’t have a barbell, you can do this movement with a kettlebell or dumbbell. Place the weight across your hips and hold it with both hands. Then perform the movement as described in the barbell version.
To learn more about the benefits of hip thrusts and effective variations, check out our article How to Do Hip Thrusts Properly for a Perfect Glute Workout: 6 Top Variations.
8. Barbell Deadlift
- Starting position: Stand in front of a loaded barbell or trap bar with your feet about hip-width apart and toes pointing forward. Bend your knees and hinge forward at the hips while keeping a natural spinal curve and your head aligned with your spine. Grip the bar with both hands—either using an overhand grip or a mixed grip for heavier loads (one hand overhand, one underhand). Your hands should be roughly shoulder-width apart or slightly wider.
- Execution: Inhale, then exhale as you begin to lift by pushing through your legs and engaging your glutes. Straighten your knees first, followed by your torso, in one fluid motion. The bar should travel close to your body on the way up. Move directly into the next rep.
- Common mistakes: Rounding the back, uncontrolled motion, limited range of motion.
- Muscles worked: Primarily the glutes, hamstrings, and spinal erectors. Secondarily, the quadriceps, trapezius, lats, forearms, and core.

Alternative variations:
1. Sumo Deadlift
If you want to place more emphasis on the inner thighs, try the sumo deadlift. The key difference is in the stance. Stand with your feet wider than shoulder-width, with toes and knees pointing outward. Grip the bar shoulder-width apart and perform the movement as in the conventional deadlift.
2. Romanian Deadlift
Ideal for anyone looking to target the glutes and hamstrings more intensively, the Romanian deadlift begins from a different starting position. Stand upright with your feet hip-width apart and grip the barbell with both hands at roughly shoulder width. Hold the bar in front of your thighs with your arms extended. Inhale, then push your hips back and hinge at the hips to lower the bar down the front of your legs in a controlled manner. Keep your back in a neutral position and the bar close to your body throughout the movement. Once you feel a stretch in your hamstrings, exhale and drive your hips forward to return to standing. Immediately follow with the next repetition.
You’ll find even more effective deadlift variations in our article Deadlifts: Benefits, Proper Form, and the Most Effective Variants.
9. Back Squat
- Starting position: Set a loaded barbell at around collarbone height in a squat rack. Stand under the bar with your feet roughly shoulder-width apart. Rest the bar across your upper back (not the neck) and grip it with both hands beside your shoulders, elbows pointing downward. Brace your core, lift the bar from the rack, and take a step back.
- Execution: Inhale and initiate the squat by moving your hips back and down. Choose a depth that allows you to maintain the natural curvature of your spine and return to standing safely. Keep your knee, ankle, and toe aligned in a straight line. Exhale and drive through your glutes and quads to return to standing. Perform the next repetition. After your set, carefully return the bar to the rack.
- Common mistakes: Overarching the lower back, shallow depth, excessive forward lean, knees collapsing inward, uneven weight distribution, falling onto toes or heels, and inappropriate load.
- Muscles worked: Primarily glutes, quads, and hamstrings. Secondarily, spinal erectors, calves, inner thighs (adductors), and core stabilisers.

Alternative variations:
1. Goblet Squat with Dumbbell or Kettlebell
You can also perform squats using a dumbbell or kettlebell. Hold the dumbbell by the weight plate, or flip the kettlebell upside down and hold the bell. Keep the load at chest height throughout the movement. Focus on keeping your chest up and perform the squat in the same way as with a barbell.
2. Front Squat
To shift the focus more onto the front of the thighs and less on the glutes, try front squats. Hold the barbell across the front of your shoulders with elbows pointing forward throughout the lift. Maintain an upright chest, engage your core, and ensure proper squat form.
10. Barbell Back Lunges
- Starting position: Stand with your feet hip-width apart. Place a loaded barbell onto a squat rack and adjust the weight by adding or removing weight plates. Position the bar across your upper back and grip it beside your shoulders.
- Execution: Inhale, shift your weight onto one leg, and step back with the other leg into a controlled lunge. Lower your back knee until your front thigh forms roughly a 90-degree angle with your shin—or even deeper if your mobility allows. Exhale and drive through your front heel to return to standing, then repeat on the other leg.
- Common mistakes: Shallow range of motion, excessive forward lean, knees collapsing inward, poor weight distribution, and uncoordinated movement.
- Muscles worked: Primarily glutes and quads. Secondarily, hamstrings, calves, core, and adductors (inner thighs).

Alternative variations:
1. Forward Lunges
Instead of stepping backward, perform forward lunges to place more emphasis on the quads and slightly less on the glutes. Alternate stepping forward with each leg.
2. Single Arm Overhead Dumbbell Lunge
To also target the upper body, try lunges while holding a dumbbell overhead. This adds activation to the shoulders, traps, and deep spinal stabilisers. Hold a dumbbell overhead in one hand, with your other hand on your hip or in front for balance. Brace your core and perform either forward or backward lunges.
You’ll find even more effective squat and lunge variations in our article How to Do Squats and Lunges: Proper Technique and the 15 Best Variations.
2 Full-Body Training Plans
Compound exercises should be included in your training 2–3 times a week. Always leave enough downtime between sessions—at least 48 hours for large muscle groups—so your body has space to recover. Depending on your goals, you can also add isolation exercises like bicep curls, tricep extensions, or shoulder raises to supplement your routine.
In the sample training plans below, you’ll find recommended loads (given as percentages of your 1RM—one-rep max), rep and set ranges, and rest periods that are ideal for building muscle. If your goal differs, adjust these values using the table below. [1]
Recommended Load, Reps, Sets and Rest Times Based on Training Goal
| Rest Period | ||||
|---|---|---|---|---|
| Increase strength | 80–95 % | 2–6 | 4–6 | 90 seconds–4 minutes |
| Muscle growth (hypertrophy) | 60–80 % | 8–12 | 4–6 | 1–3 minutes |
| Muscular endurance | <60 % | >15 | 2–6 | <1 minute |
| Weight loss | 60–80 % | 8–12 | 4–6 | 1–3 minutes |
If you’re unsure how to build a full training plan, check out the article How to Create an Effective Gym Training Plan.
1. Full-Body Workout With Fundamental Lifts for Strength and Muscle Growth
Workout 1 is based around the three fundamental lifts—squat, deadlift, and bench press. These are the most comprehensive and demanding exercises, delivering major strength and muscle gains. We’ve added an overhead barbell press to target the shoulders for a well-rounded session.
| Back Squat | 60–80 % | 8–12 | 4–6 | 1–3 minutes |
| Conventional Deadlift | 60–80 % | 8–12 | 4–6 | 1–3 minutes |
| Bench Press | 60–80 % | 8–12 | 4–6 | 1–3 minutes |
| Overhead Barbell Press | 60–80 % | 8–12 | 4–6 | 1–3 minutes |
2. Full-Body Workout With Compound Exercises
This second workout starts with back lunges, a unilateral movement—meaning you train one leg at a time, helping to reduce muscular imbalances. You’ll then move into kettlebell swings for lower-body power and finish with a series of upper-body-focused compound moves.
| Barbell Back Lunges | 60–80 % | 8–12 (per each leg) | 4–6 | 1–3 minutes |
| Kettlebell Swing | 60–80 % | 8–12 | 4–6 | 1–3 minutes |
| Bent-Over Barbell Row | 60–80 % | 8–12 | 4–6 | 1–3 minutes |
| Dumbbell Pullover | 60–80 % | 8–12 | 4–6 | 1–3 minutes |
| Dumbbell Roll-Ups | 60–80 % | 8–12 (per each arm) | 4–6 | 1–3 minutes |
Where to Next?
- If you’d like to focus more on specific upper-body muscle groups, explore our top exercises for shoulders, biceps, triceps, back or core.
- For lower-body goals, check out the best moves for glutes and legs, hamstrings, thighs and calves.
- Full-body routines can also include fundamental exercises using barbells, dumbbells or powerbags.
- To support your training with the right nutrition, read the article Custom Meal Planning: A Complete Guide to Calculating Calories and Macros.
What Should You Remember?
Compound exercises are an ideal addition to any full-body routine. They target multiple muscle groups at once, helping you build strength, muscle, and support fat loss. They also improve coordination and save time in the gym.
If you want to include them in your training plan, start by mastering the proper technique. Only then gradually increase the load. You can perform these movements 2–3 times per week depending on your schedule—but make sure to rest for at least 48 hours between sessions. Recovery, sleep and a well-balanced diet are all key parts of the puzzle.
Did you find this article helpful? If so, feel free to share it with your friends and spread the motivation for training with compound exercises!
[1] Schoenfeld, B. J., Grgic, J., Van Every, D. W., & Plotkin, D. L. Loading Recommendations for Muscle Strength, Hypertrophy, and Local Endurance: A Re-Examination of the Repetition Continuum. – https://doi.org/10.3390/sports9020032
[2] The Output. Why Compound Exercises Are the Key to Being Fit for Life. – https://www.onepeloton.com/blog/compound-exercises/
[3] Physiopedia. Compound Exercises. – https://www.physio-pedia.com/Compound_Exercises
[4] UNSW Sites. What are compound exercises and why are they good for you? – https://www.unsw.edu.au/newsroom/news/2024/06/what-are-compound-exercises-and-why-are-they-good-for-you
[5] Durand, R. COMPOUND VS ISOLATION EXERCISES: NEW STUDY SAYS YOU NEED BOTH FOR GAINING MUSCLE! EVIDENCE BASED MUSCLE. – https://evidencebasedmuscle.com/compound-vs-isolation-exercises/
[6] Compendium of Physical Activities. Conditioning Exercise. – https://pacompendium.com/conditioning-exercise/
[7] Schuenke, M. D., Mikat, R. P., & McBride, J. M. Effect of an acute period of resistance exercise on excess post-exercise oxygen consumption: Implications for body mass management. – https://doi.org/10.1007/s00421-001-0568-y
Add a comment